

Client's with a need to secure legacy servers behind a reverse proxy server have an option to use Microsoft IIS. While we typically recommend using a Linux server that has NGINX installed, we understand the need for such a use case and feel it's important to demonstrate this basic technique.
We'll be using a VM running Windows Server 2019 with IIS 10 installed. The IIS extension we'll use is called URL Rewrite and has been around since IIS 7, so this technique should work well with older versions of IIS.
Assumptions
We won't cover the basics of spinning up a VM running Windows Server on Microsoft Azure in this article. For more information on that topic, check out this great Microsoft Quickstart Tutorial on setting up a VM and installing IIS.
This article assumes you have the following items setup prior to starting this tutorial:
- Azure Portal - you will need a Microsoft Azure account.
- Azure Windows VM - we will be running Windows Server 2019 for this tutorial.
- IIS - we have installed IIS 10.
- Domain Name - you will need access to a domain or use a dynamic DNS service.
- DNS - we have setup azure-test.tevpro.com to point to the public IP of our VM.
Step 1: Install URL Rewrite
We have installed IIS 10 using a simple PowerShell command.
Doing so will setup and configure IIS using all the basic defaults that come with IIS.
Install-WindowsFeature -name Web-Server -IncludeManagementTools
The first thing we need to do is install an IIS extension called URL Rewrite. This will allow us to configure IIS to act as a reverse proxy server.
On the server you choose as your reverse proxy, download and install the URL Rewrite extension taking all the defaults when installing.
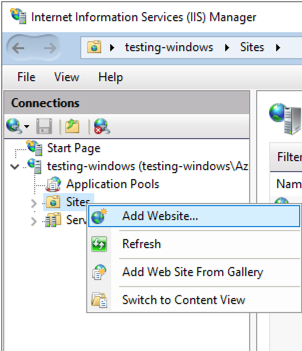
Step 2: Setup a Website
To begin, open up IIS manager and create a new website to use as your reverse proxy end-point. It should look like this:
Right click on Sites, then select Add Website.
Next, fill in some details about the website. For our example, we will create a new sub-domain for our Tevpro.com website.
Note: Even though we aren't setting up an actual website, we still need to create a folder somewhere for our dummy site. Here, we created a test folder under our websites folder.
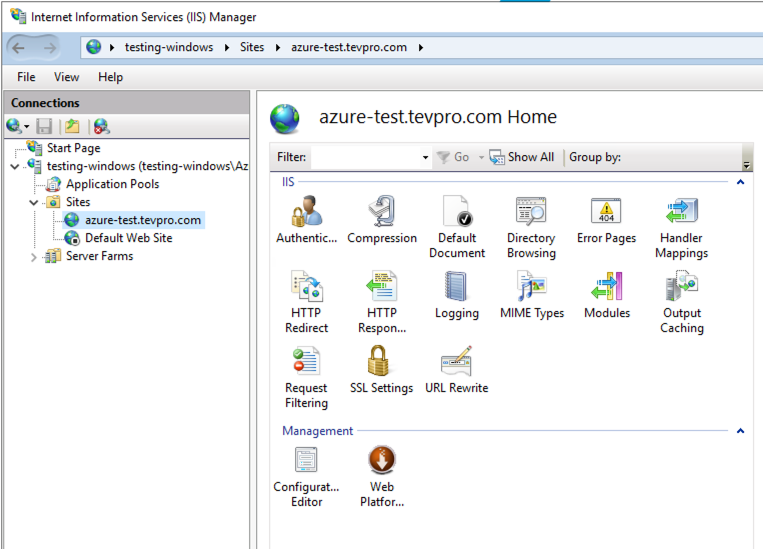
Once you have completed the form, click OK.

After clicking OK, we should see our website.
When selected, we should see the following options. Notice the URL Rewrite option that shows up after we successfully installed the extension. This is what we will use to configure our reverse proxy.
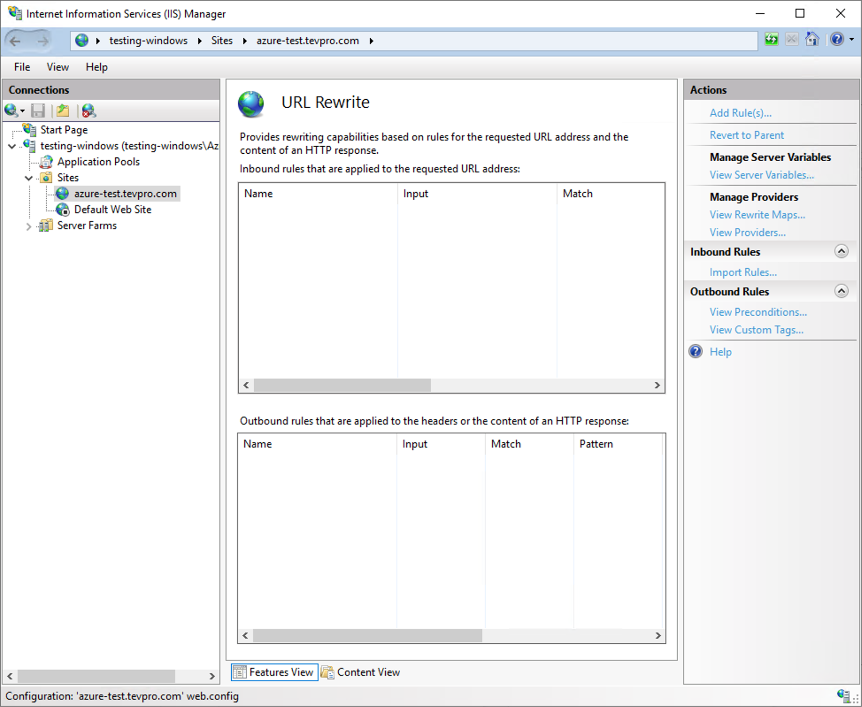
Step 3: Configure URL Rewrite
After we have setup our new website, that will act as our public end-point, we need to configure it as our reverse proxy.
To do this, double click on the URL Rewrite option under our website (shown in Figure 3).
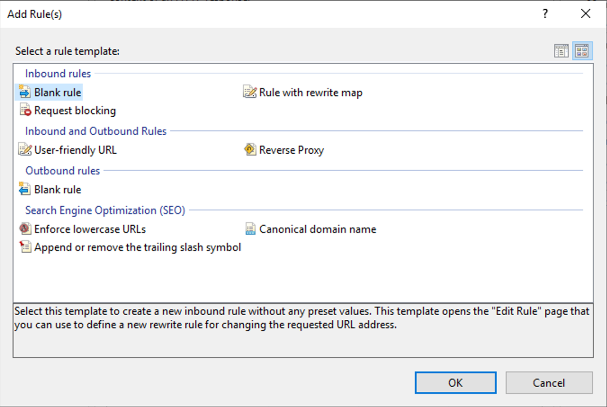
Next, click the Add Rule(s) item from the Actions section on the far right.
This will bring up the following dialog, under Inbound rules. Select Blank rule and click OK.
For our example, the configuration is pretty straightforward. It's outside of the scope of this article, but know you can get more complex in the pattern matching and route handling.
First, we need to provide a name for our rule, add a pattern for how we want to match incoming request, and set the rewrite URL.
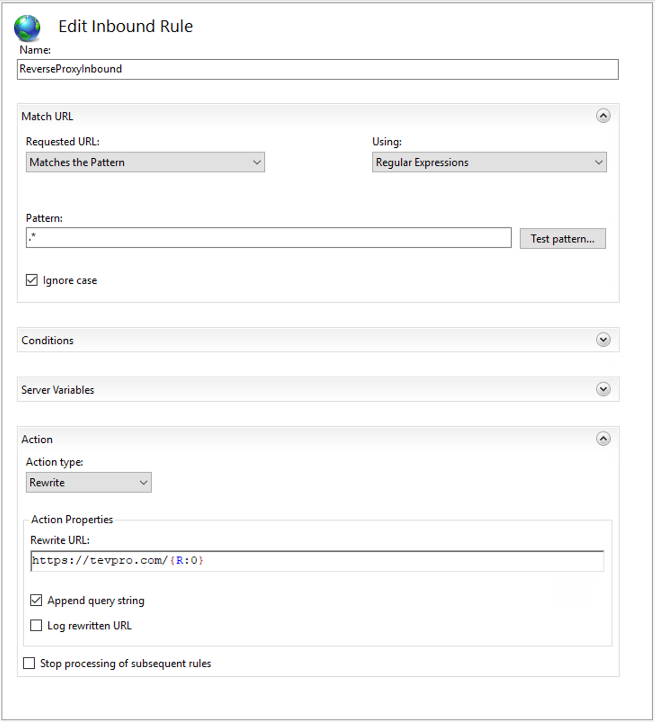
Breaking this step down a bit further, the pattern is how we want to handle capturing incoming request to the website we setup to act as our reverse proxy (azure-test.tevpro.com).
Since we want to be very broad and capture everything, our regex is quite simple. We want to match everything after the domain name, which is what ".*" will do for us.
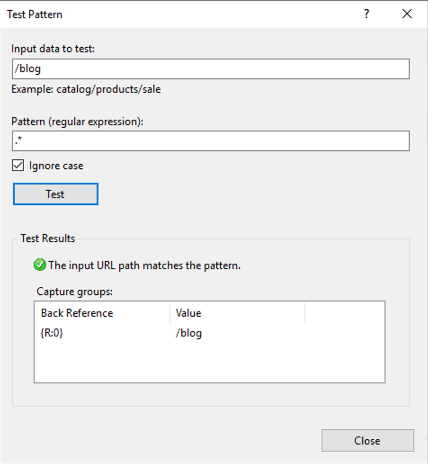
Click the Test pattern... button and a tool dialog pops up that allows us to test our pattern. We want to make sure that anytime someone visits azure-test.tevpro.com/blog, we capture anything after the domain name. This way we ensure when we rewrite the URL, we can point to the right location.
Take note of the capture group {R:0}. We will use this to configure our rewrite URL.
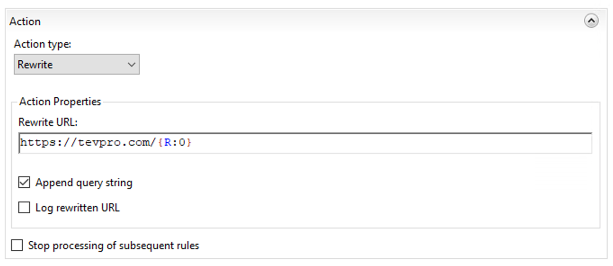
Taking a closer look at our action section, we see the Rewrite URL input field. This field indicates where we want our website to point. Since we want to route back to our website, we put in the URL and append the regex capture group {R:0} from the previous test pattern.
This will forward any request coming into our reverse proxy to the origin server tevpro.com keeping the URL fully intact.
Once you have finished setting up the new rule, click Apply.
And viola. We have configured our new website to act as a reverse proxy.
Note: Since we require SSL for our website, we configured SSL for our test server. That's beyond the scope of this article, however we used Let's Encrypt.
Step 4: Test the Reverse Proxy
Now that we have completed the reverse proxy configuration, we need to test our new website.
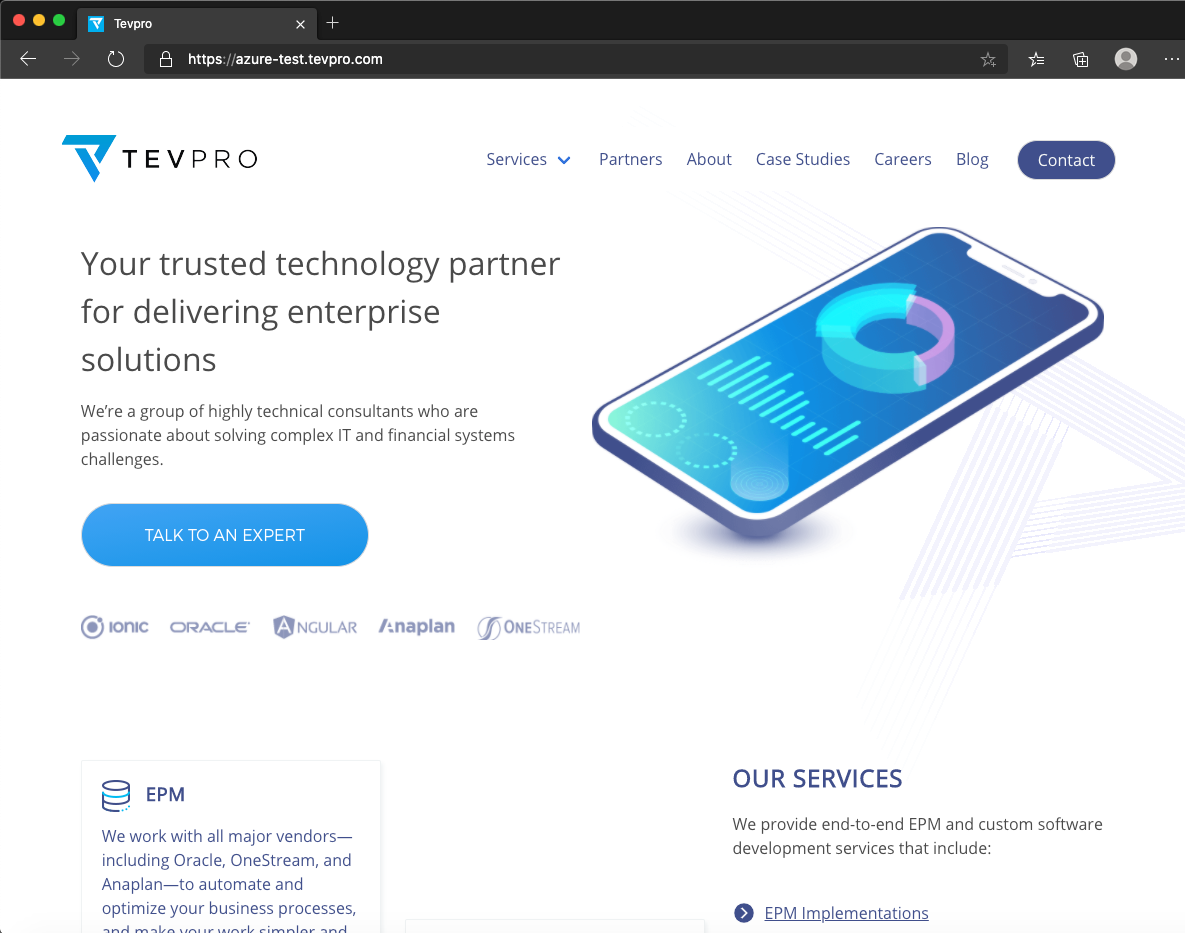
We expect that anytime a user visits the URL, azure-test.tevpro.com, we'll automatically reroute the corresponding request to tevpro.com.
As you can see below, when we type the URL into our web browser, we see the Tevpro.com website. It is actually being masked behind our reverse proxy website. Pretty cool, right?
Conclusion
As you can see, it's pretty simple technique to set up a reverse proxy server using IIS. The IIS extension does most of the heavy lifting and can be used for more complex routing when needed.
Whether you're trying to protect a legacy system or add an extra layer in front of your existing website to make migrations easier, this approach has worked well over the years.
At Tevpro, we have helped countless clients improve their business with even the most basic techniques and technology solutions. We're here to help clients discover their potential in a range of solutions, and weigh pros/cons, so that they are empowered to make the best decision for their business.
Feel free to reach out to us on Twitter or via email with any questions.
Photo by Science in HD


Angular • React • Ionic • NestJS • C# • Azure • Next.js